3 Easy ways to simulate sensor data using Mapify
June 17, 2024
Mário Sobral

There are many scenarios in which physical sensors or devices aren't deployed yet or available in the early stages of a project or solution implementation, causing delays and increasing the probability of errors and issues in the final result.
In order to mitigate such situations, there are a few ways for you to simulate data being sent to Mapify, allowing you to configure and test your Mapify instance, including data feeds, workflows and visual rendering in map layers.
The most common approaches are:
- Mapify Simulations
- Mapify API
- Mapify Data Feed MQTT broker
Mapify Simulations
Mapify provides you with the ability to generate simulated JSON messages and publish them to a Data Feed. This useful feature effectively provides you with the ability to create simulations which allow you to configure your Mapify solution when live data from sensors and other external systems has not been made available yet.
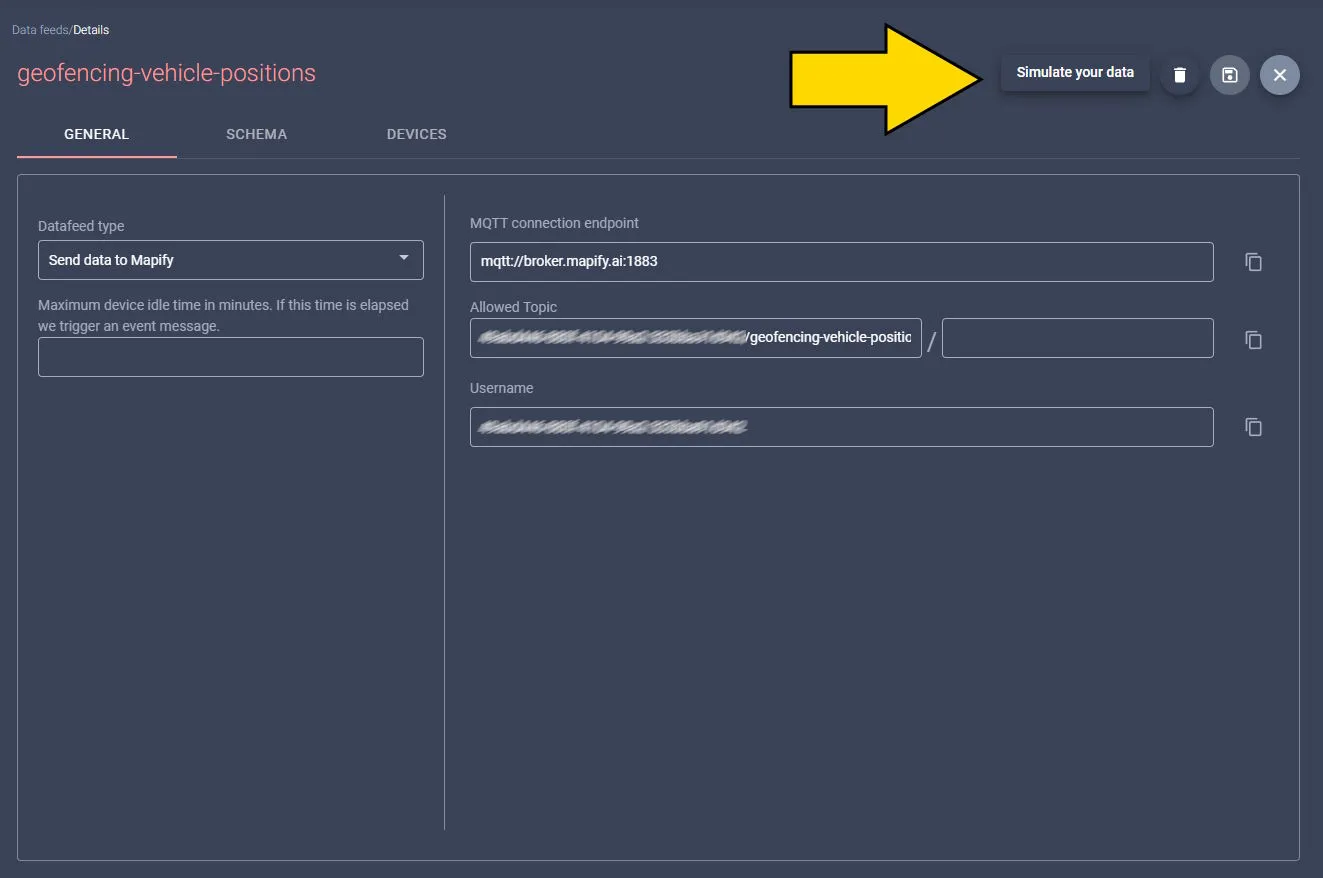
You can access Mapify Simulations from the left-hand menu in the console, or directly from the "Simulate Your Data" button on a Data Feed details screen (as illustrated below).
The Schema tab provides you with a message editor with a sample of the message to be sent to your configured Data Feed, filled in with some simple placeholder values. Naturally, you will most likely need to configure this message template with values which reflect the real world possible values which match your sensors and business case.
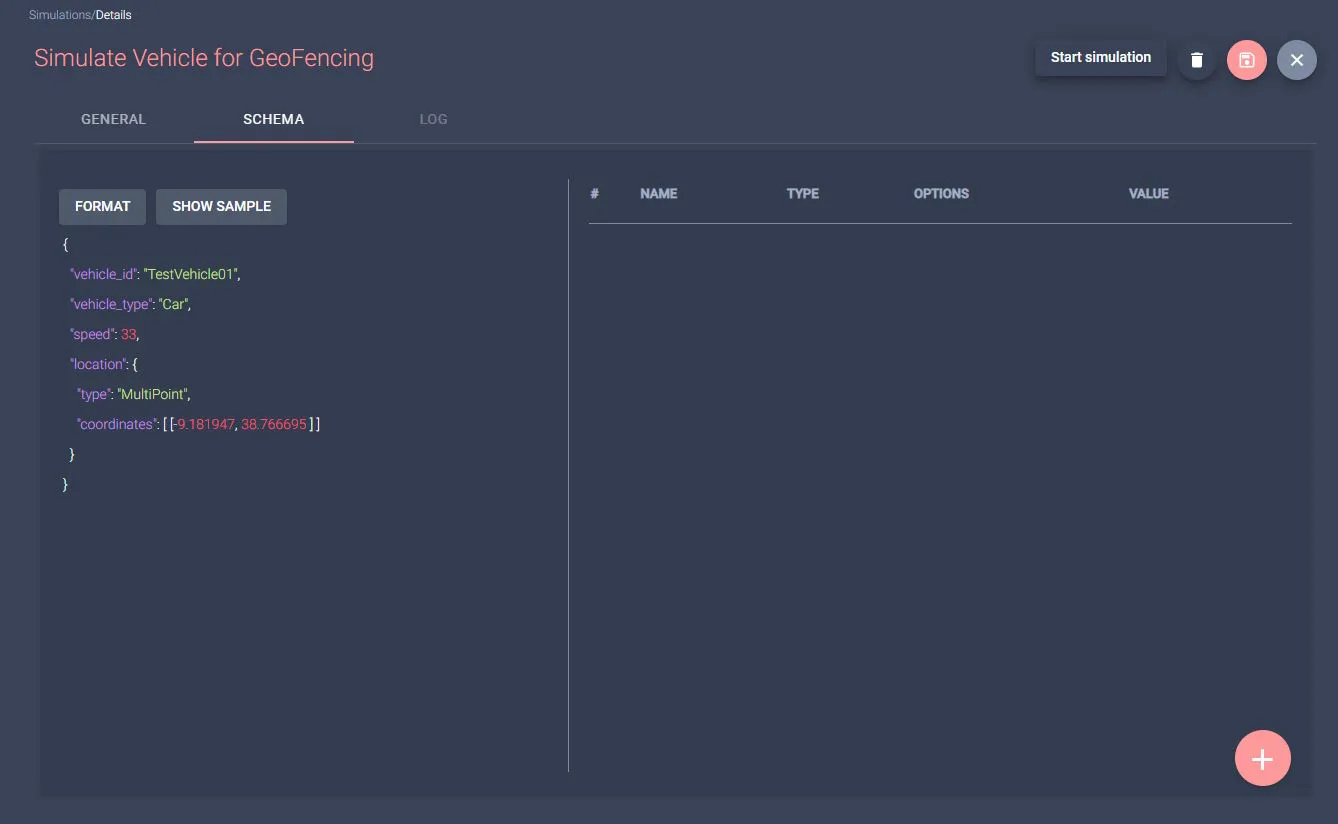
Given the screenshot above, the following message would be sent to the configured Data Feed, and processed by the associated Workflows, if you started the simulator:

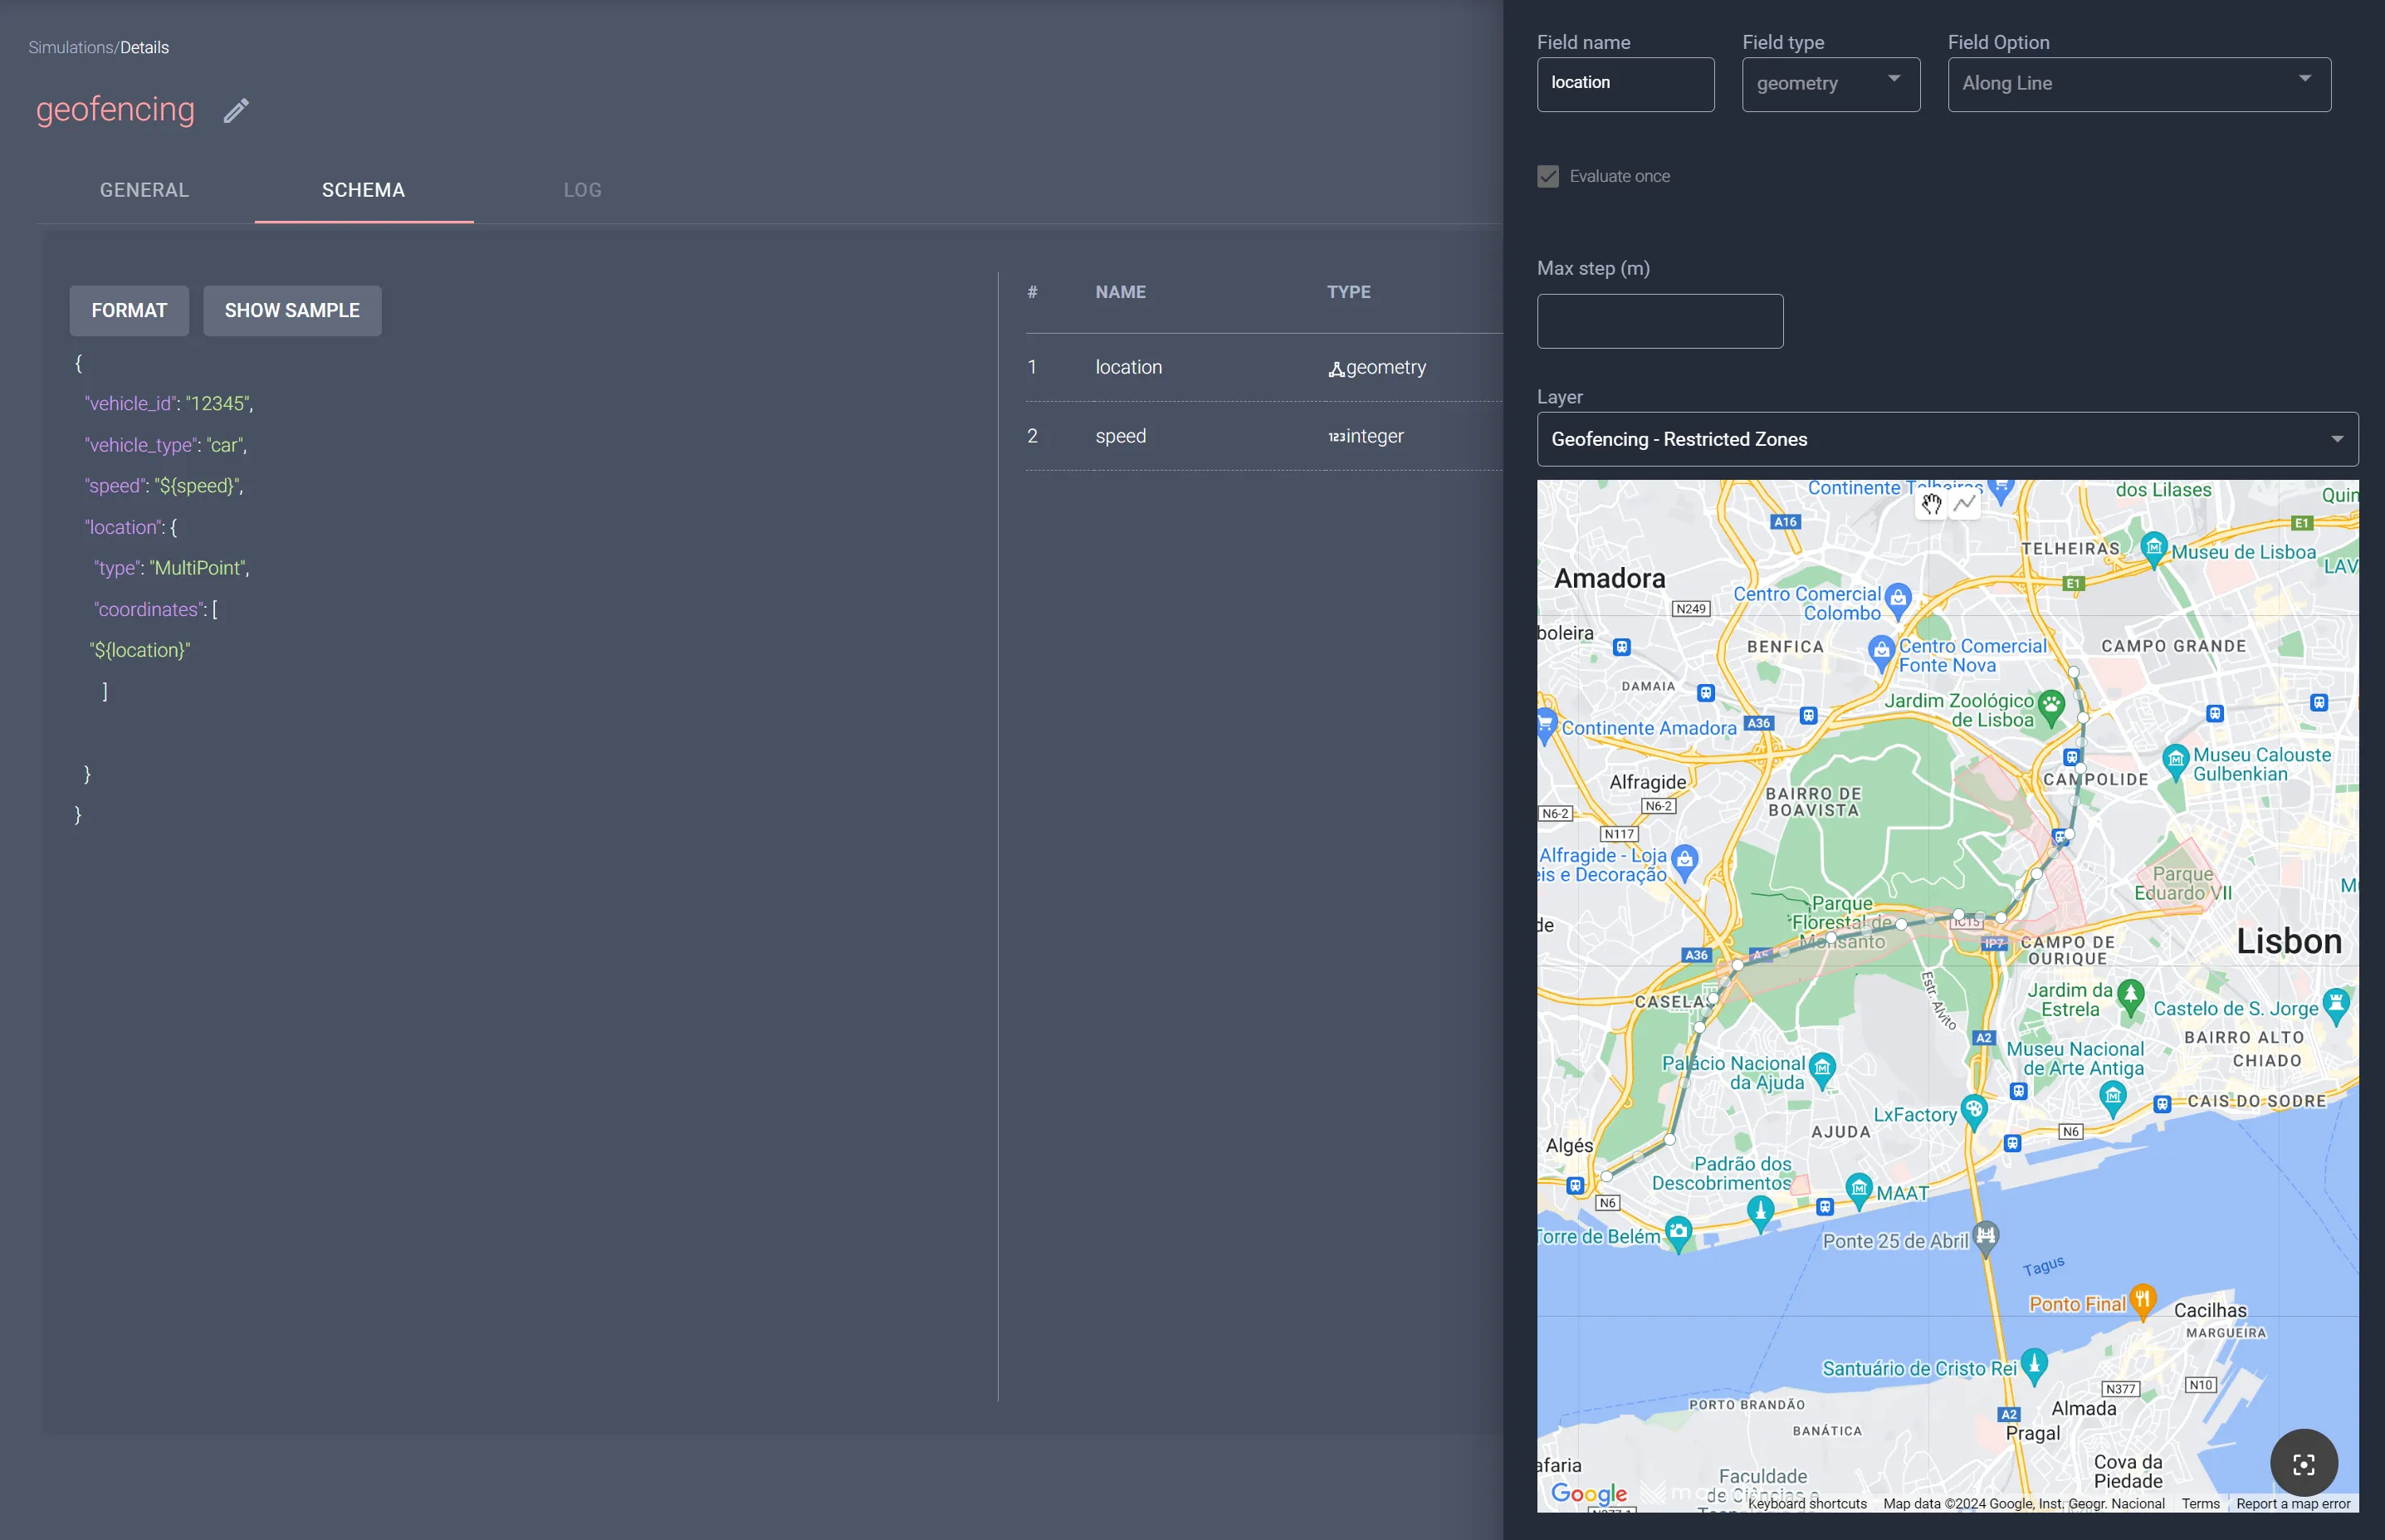
Even though replicating a specific static message can be very helpful in many situations, Mapify Simulations provide you with the ability to generate message field values dynamically, with Mapify generating their values according to configured settings. This allows you to have dynamic messages which can reflect sensor value variations, vehicle movements, incident locations, and many more dynamic changes of values.
We also have a video explaining how Mapify Simulations works. Be sure to check out our documentation for additional details and features.
Mapify API
Since Mapify is a cloud-based platform built using an API-first approach, it is usual for customers to use Mapify's REST API to leverage its functionality in their own projects and solutions.
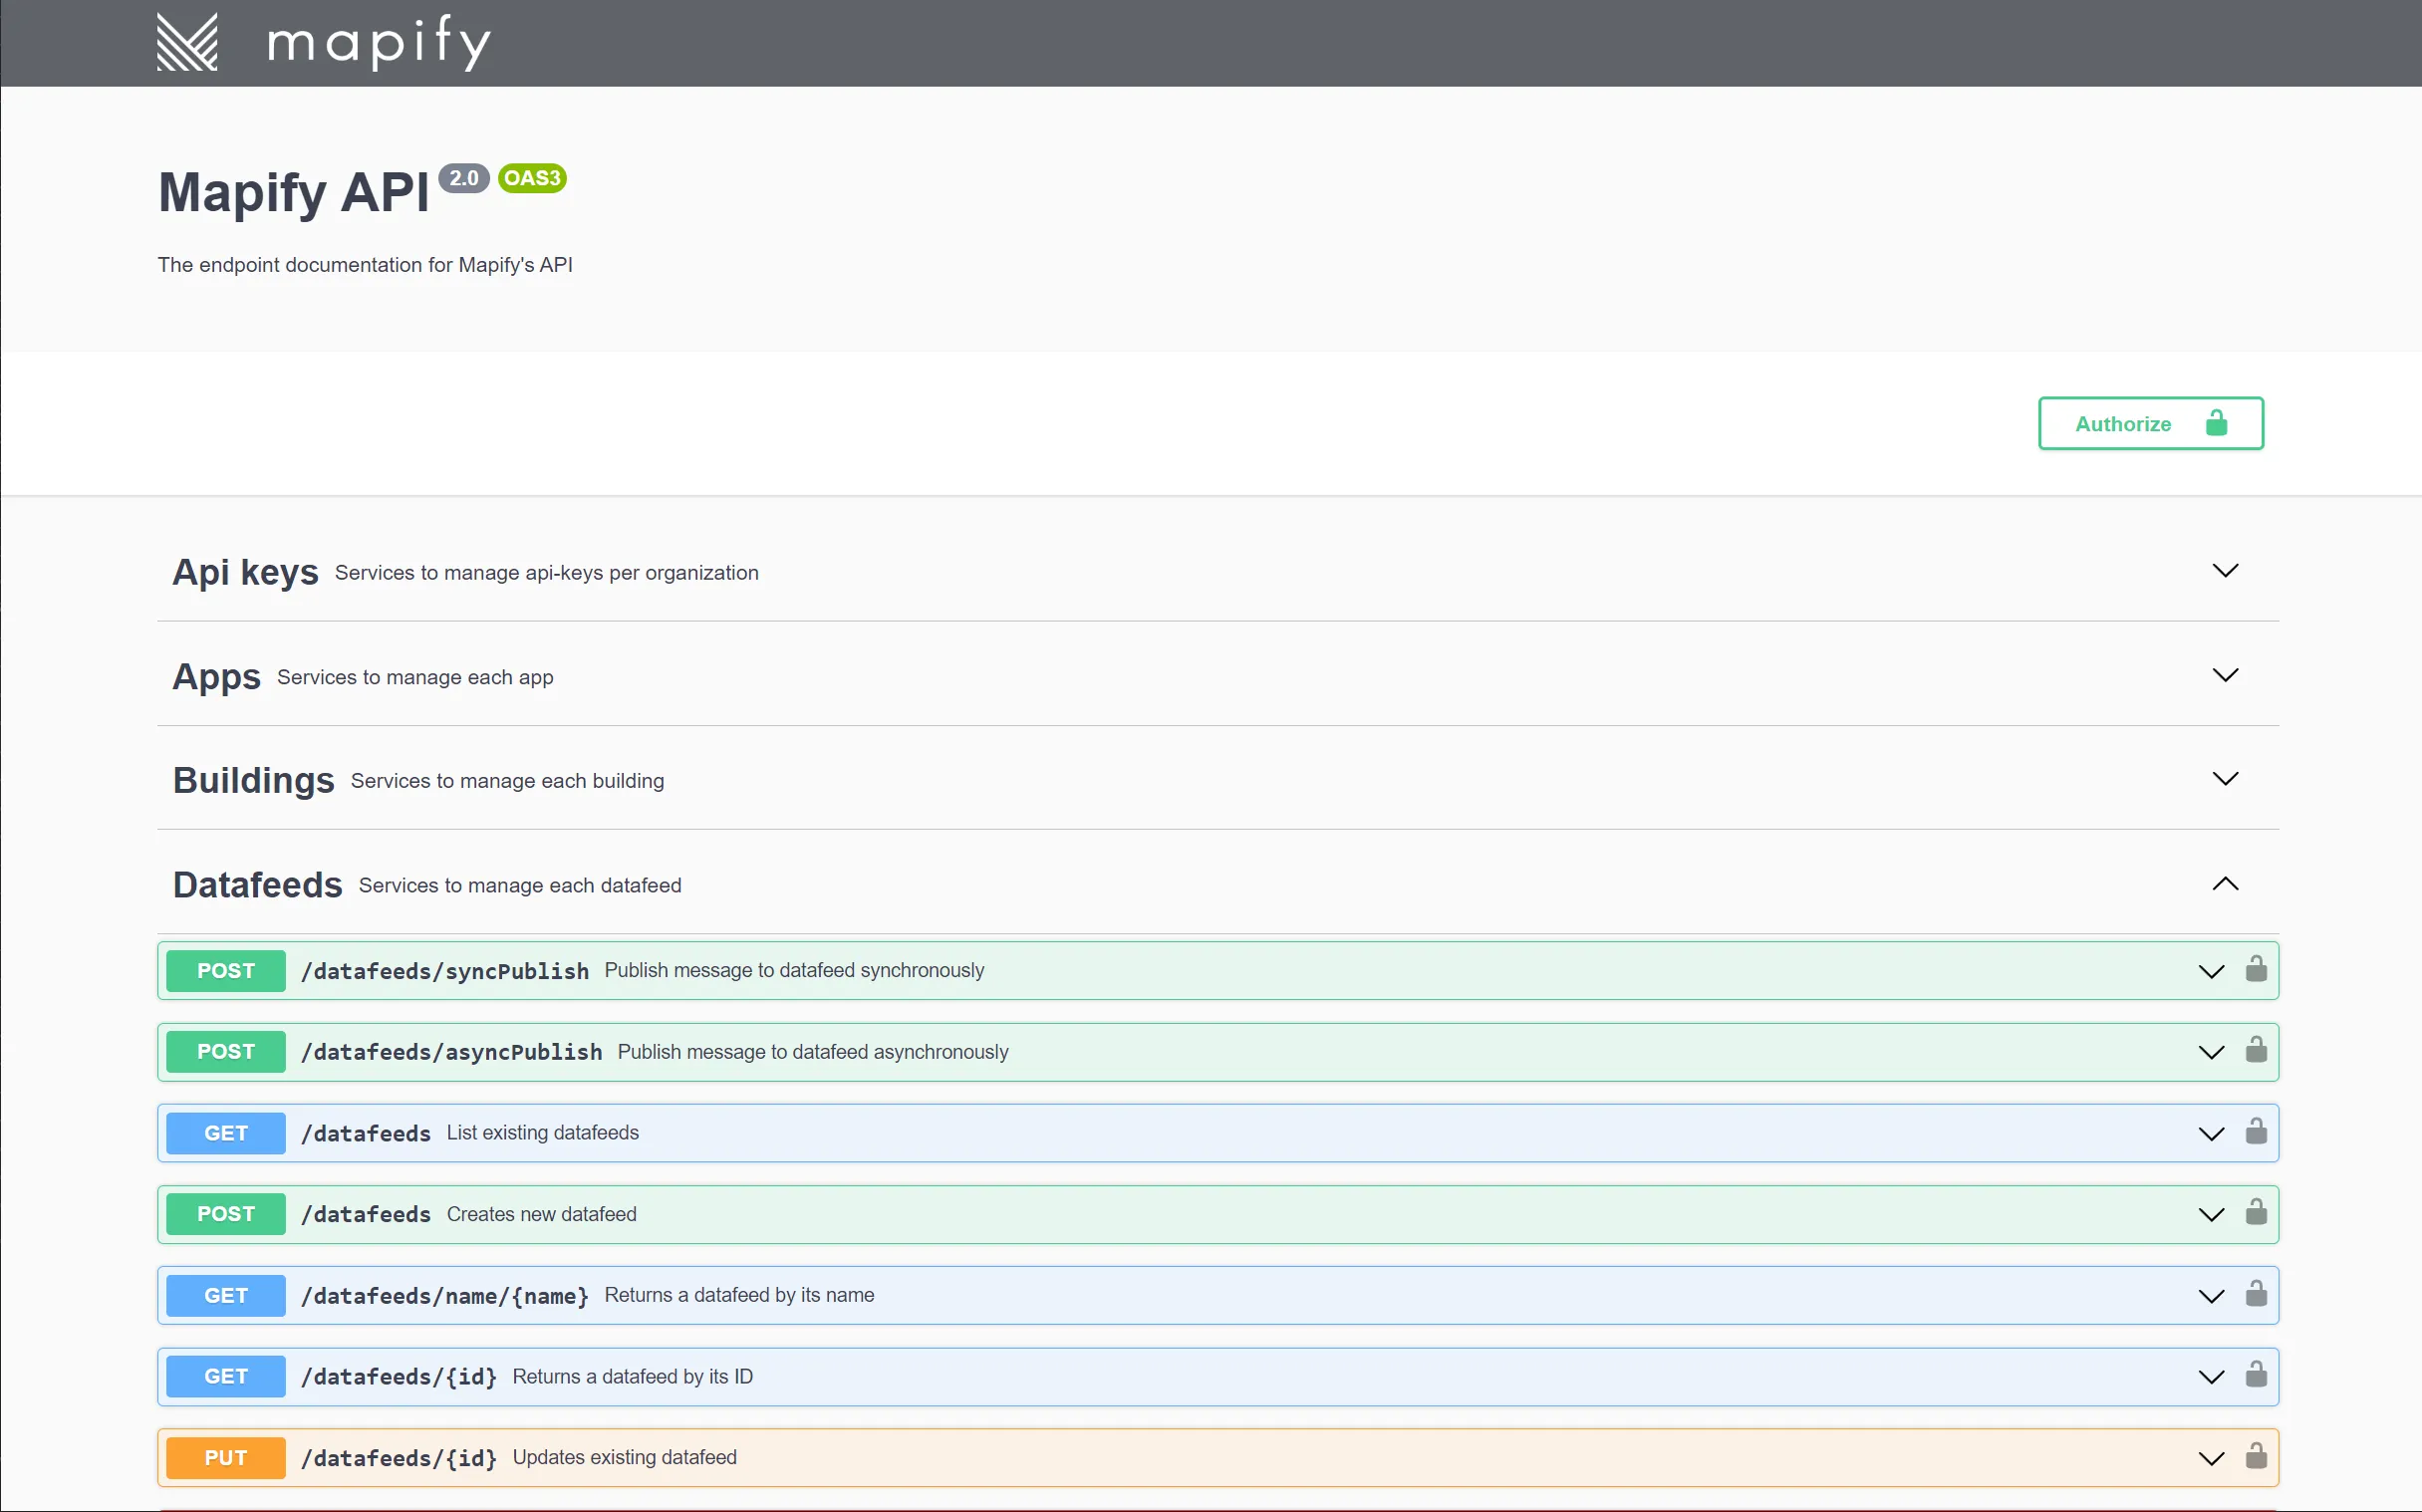
The same can be applied when there is the need to simulate messages being sent to a Data Feed, with two endpoints which provide a direct way to publish messages to a Data Feed:
These methods differ only in the way the request/response is handled. The syncPublish endpoint makes a synchronous request and waits for the response (which can indicate if the message was successfully processed by one or more Workflows), while asyncPublish makes an asynchronous request.
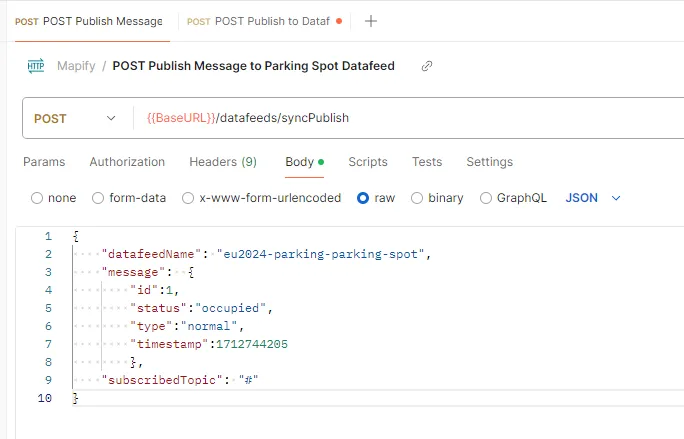
An example of synchronously publishing a message to a Mapify Data Feed using the cUrl command from your machine's command line could look like the example below:
curl --location 'https://api.mapify.ai/datafeeds/syncPublish' \
--header 'map-api-key:xxxxxxxxxxxxxxxxxxxxxxxxxxxxxxxxxxxxxxxxxxx' \
--header 'Content-Type: application/json' \
--data '{
"datafeedName": "test-parking-parking-spot-sensor",
"message": {
"id":1,
"status":"occupied",
"type":"normal",
"timestamp":1712744205
},
"subscribedTopic": "#"
}'
You can also use tools such as Postman to configure your requests.
Mapify Data Feed MQTT broker
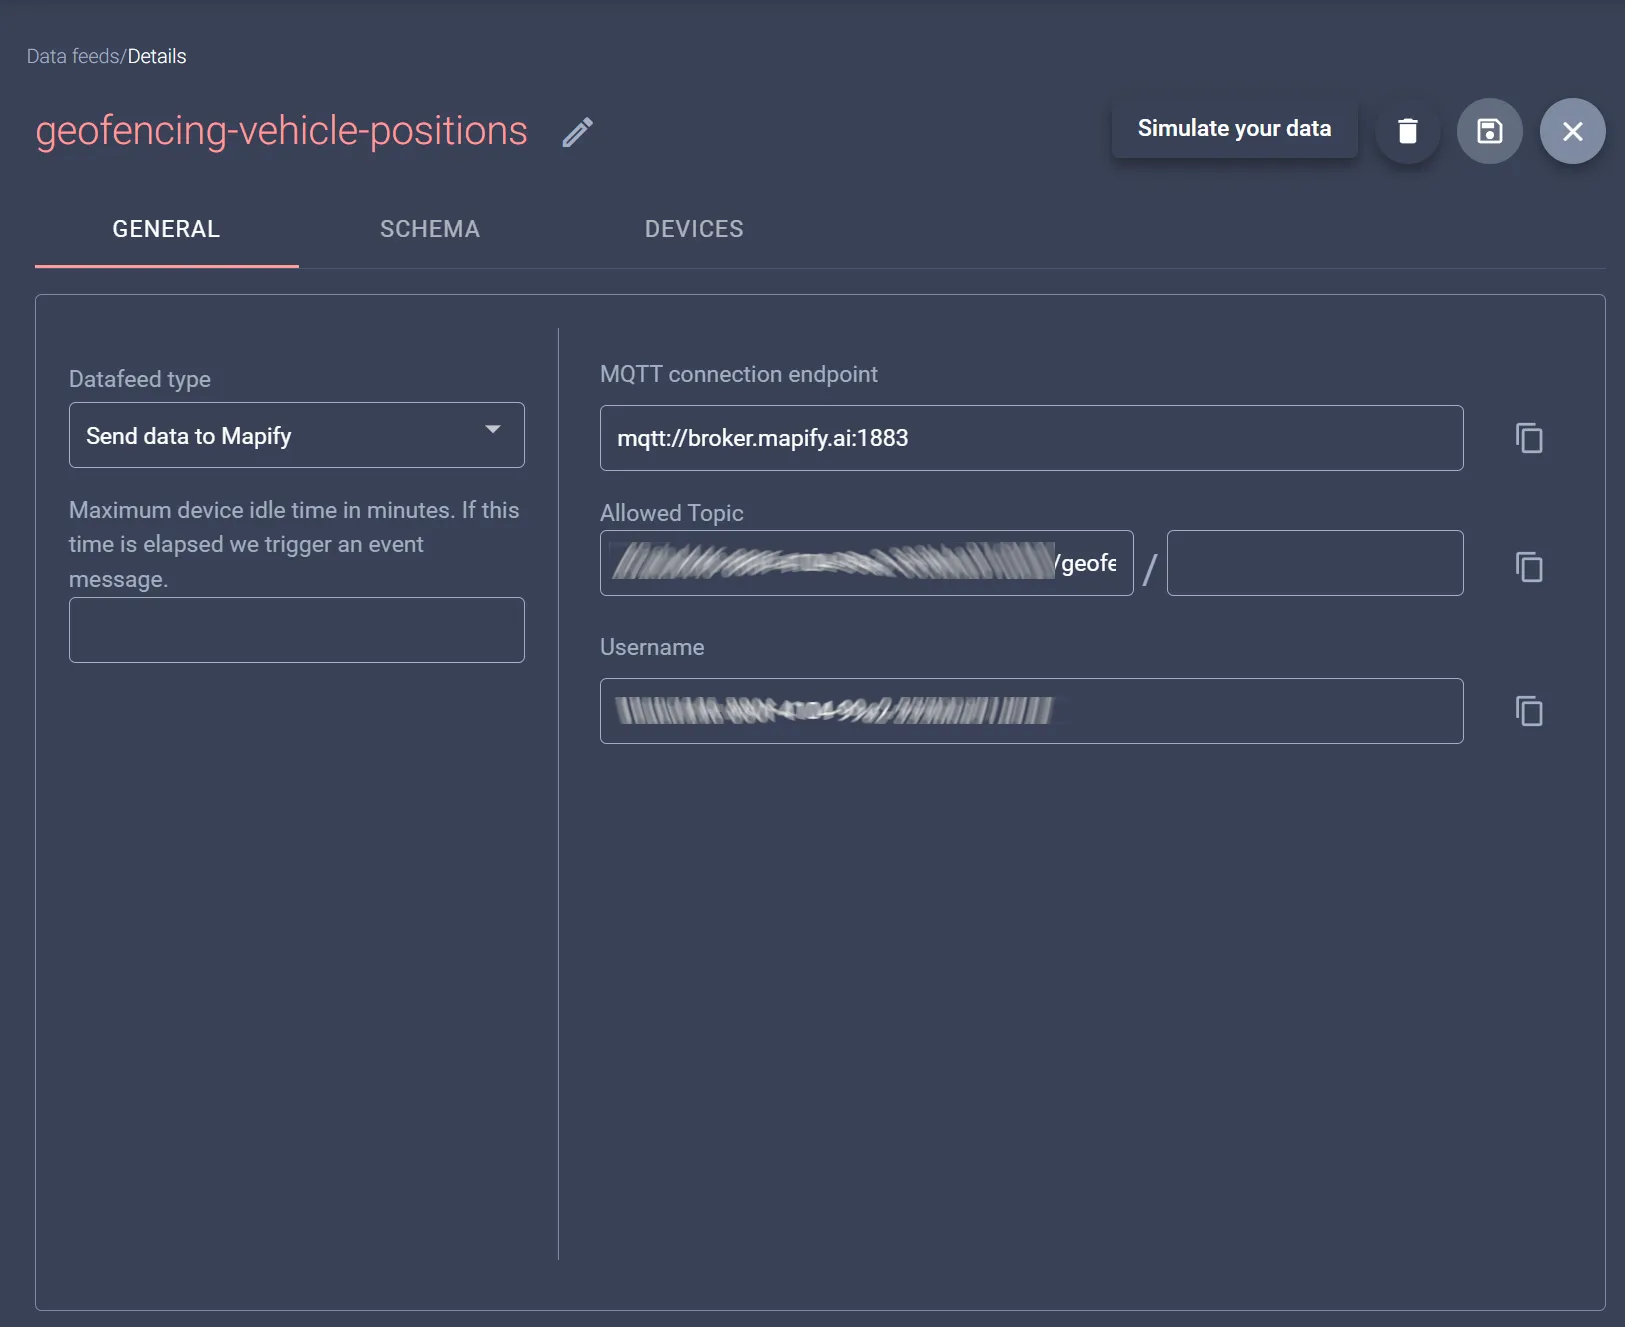
When you create a Data Feed to which data will be pushed directly from your sensors/devices, Mapify will generate a virtual MQTT topic to which you can publish your messages.
In order to publish messages to a Data Feed's associated MQTT broker and topic, you can connect using the MQTT connection settings available on the MQTT connection settings panel. You will need to use a valid Mapify API Key with the necessary claims as the password for the authentication.
You can use any MQTT client to test your connection, such as MQTT Explorer or a similar tool, or implement an MQTT message publishing function in the code of your solution. For more details regarding publishing MQTT messages to a Mapify Data Feed, check the our documentation.
Start simulating your sensor data right now
Mapify is extremely flexible when it comes to handling incoming messages, allowing you multiple ways to simulate incoming messages from sensors, devices and gateways. This provides an easy way to configure and define your business rules and processes in Mapify even before physical devices are deployed, providing you an advantage over many device manufacturer proprietary and lock-in approaches.
With our Mapify trial, you can simulate sensor data using one of these ways, all wihout the need for physical sensors. Don't let delays disrupt your project timeline anymore. Click here to start your free trial 👉 mapify.ai/trial